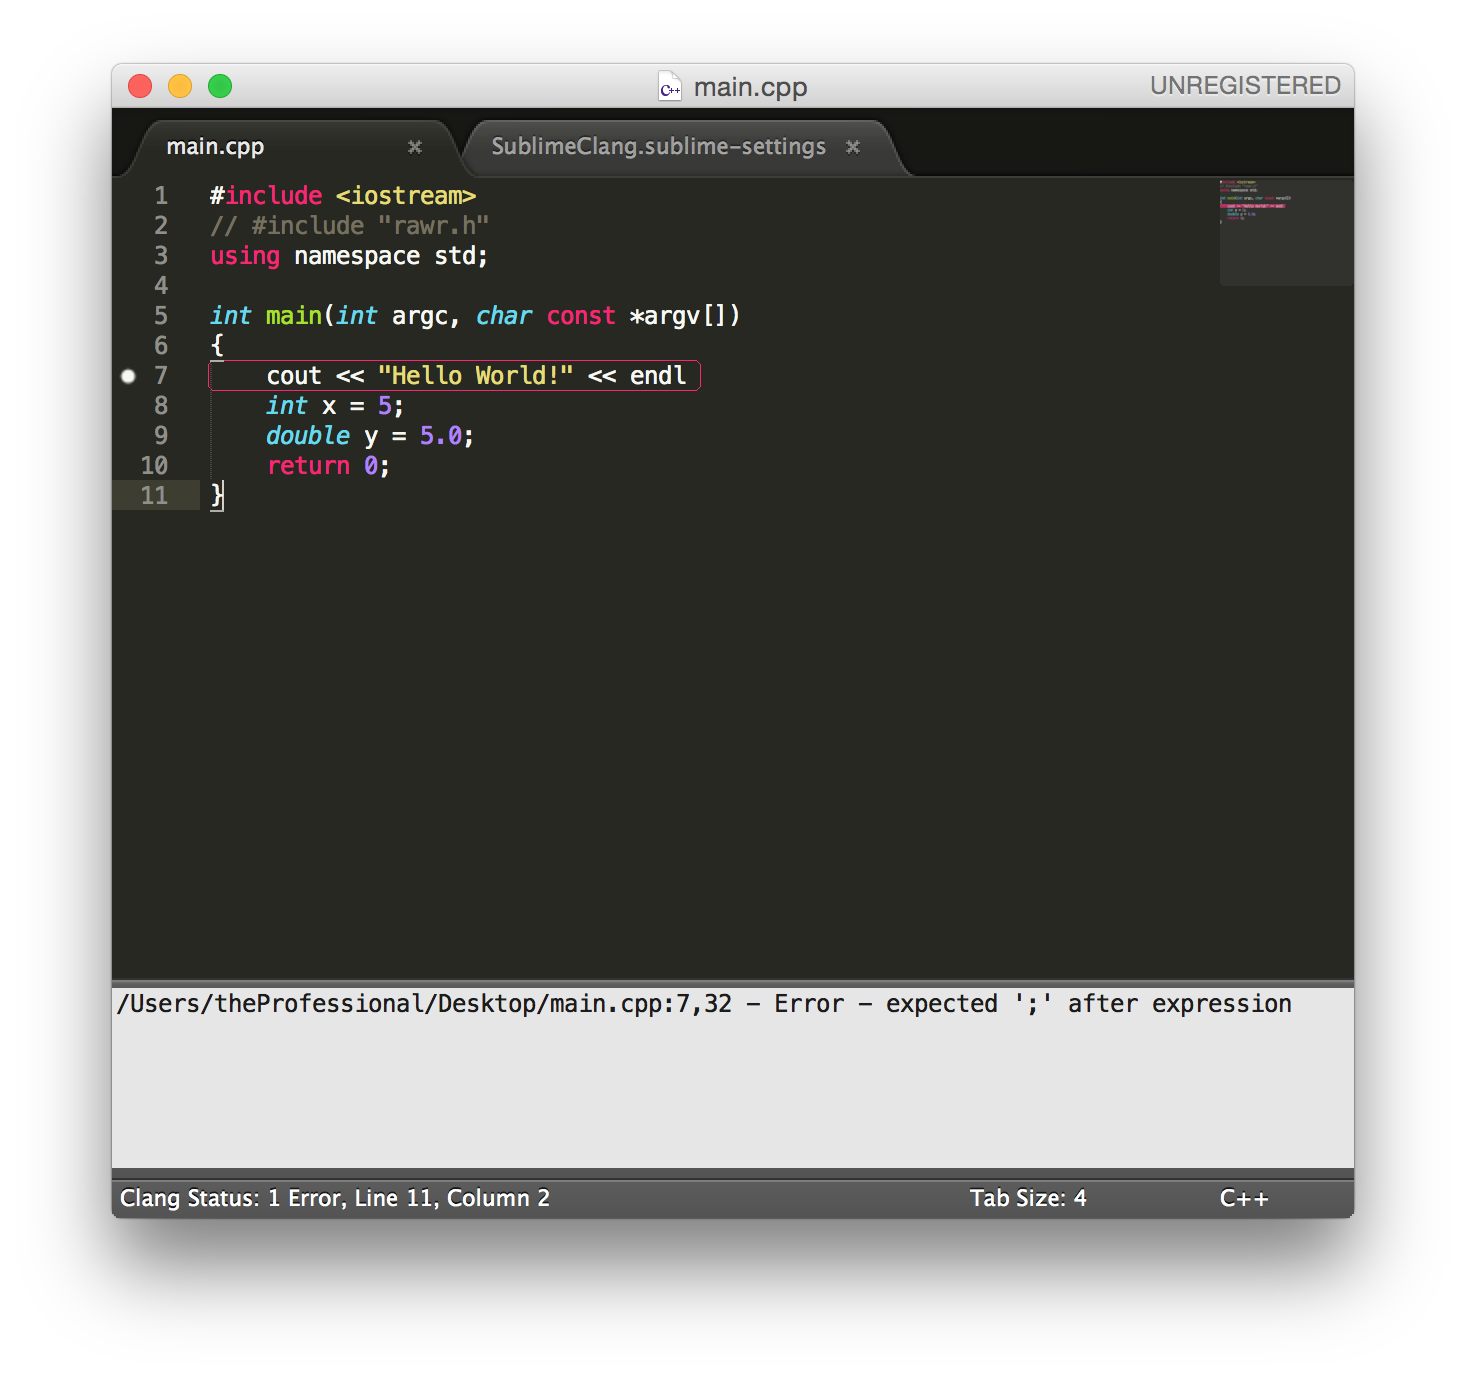
Code-Completion in Sublime Text
This is a guest post from Alex Chojnacki (thealex@umich.edu), who took EECS 281 with me, and has worked extensively with a Sublime Text development environment for 281.
We use SublimeClang to get compiler warnings and errors directly in Sublime Text, even if we’re compiling in CAEN. You’ll want to use this in conjunction with some method to edit remotely, such as SSHFS or SFTP.
Prerequisites
This guide is for Mac OS X users only.
Here’s a workflow for those of us who love Sublime, but miss the code completion elements of IDEs. The solution is a plugin and a short list of dependencies.
Things you will need (install in this order):
-
Sublime Text 2 (this will not work for Sublime Text 3): http://www.sublimetext.com/2
-
Package Control for Sublime Text 2 (everyone should get this if they use Sublime): https://packagecontrol.io/installation#st2
-
Homebrew: http://brew.sh/
-
SublimeClang: In Package Control, search “SublimeClang” and select the package (it should be the only one named this — if it is not, you may be using Sublime Text 3).
Installing GCC
To use SublimeClang, we’ll need a custom version of the GNU Compiler Collection
(or “GCC”) supporting C++11. (We’ll use GCC 4.9.) First type brew tap
homebrew/versions into the terminal and hit enter. My output looked like this:
...

theProfessional$ brew tap homebrew/versions
Cloning into '/usr/local/Library/Taps/homebrew/homebrew-versions'...
remote: Counting objects: 2693, done.
remote: Total 2693 (delta 0), reused 0 (delta 0)
Receiving objects: 100% (2693/2693), 884.52 KiB | 0 bytes/s, done.
Resolving deltas: 100% (1562/1562), done.
Checking connectivity... done.
Tapped 171 formulae

...
Easy! The next thing you want to type is brew install gcc49. This will install
gcc 4.9.2 and a few of its dependencies. These aren’t large files, but they do
take a while to download/install, so be prepared to keep your computer powered
and connected to the internet.
The following dependencies will install automatically:
gmp4- 2.8 minutes
mpfr2- 1 minute
libmpc08- 30 seconds
pkg-config- Half a second
cloog018- 15 seconds.
Then, the main installation of gcc49 will start. This took my computer 31
minutes.
I list the times here just so you understand that it takes some time. Time will vary based on internet connection and how zippy your computer is. Here was the output at the end of the installation process:
...

==> Installing gcc49
==> Downloading http://ftpmirror.gnu.org/gcc/gcc-4.9.2/gcc-4.9.2.tar.bz2
######################################################################## 100.0%
==> Patching
==> ../configure --build=x86_64-apple-darwin14.0.0 --prefix=/usr/local/Cellar/gc
==> make bootstrap
==> make install
🍺  /usr/local/Cellar/gcc49/4.9.2_1: 1138 files, 164M, built in 31.4 minutes
theProfessional$ []

...
Configuring Sublime Text
We’re almost finished! After the install is done, you’ll want to try and compile a C++ program using your new fancy GNU compiler. I recommend compiling a simple “Hello World” on your desktop, but regardless of what you compile, make sure to use the following command to do it:
g++-4.9 helloWorld.cpp -v
The -v flag will provide verbose output, allowing us to see the paths to the
gcc49 install’s libraries. This is important because we need to tell
SublimeClang where to find these libraries! It will also produce a ton of other
output that is very scary.
Do not be alarmed by the wall of text! We will be looking for a few lines of
text — specifically the ones between #include <...> search starts here: and
End of search list.
Mine looked like this:
...
#include <...> search starts here:
/usr/local/Cellar/gcc49/4.9.2_1/lib/gcc/4.9/gcc/x86_64-apple-darwin14.0.0/4.9.2/../../../../../../include/c++/4.9.2
/usr/local/Cellar/gcc49/4.9.2_1/lib/gcc/4.9/gcc/x86_64-apple-darwin14.0.0/4.9.2/../../../../../../include/c++/4.9.2/x86_64-apple-darwin14.0.0
/usr/local/Cellar/gcc49/4.9.2_1/lib/gcc/4.9/gcc/x86_64-apple-darwin14.0.0/4.9.2/../../../../../../include/c++/4.9.2/backward
/usr/local/Cellar/gcc49/4.9.2_1/lib/gcc/4.9/gcc/x86_64-apple-darwin14.0.0/4.9.2/include
/usr/local/include
/usr/local/Cellar/gcc49/4.9.2_1/include
/usr/local/Cellar/gcc49/4.9.2_1/lib/gcc/4.9/gcc/x86_64-apple-darwin14.0.0/4.9.2/include-fixed
/usr/include
/System/Library/Frameworks
/Library/Frameworks
End of include search.
...
Those are the paths we need to give to SublimeClang! So after you search through the output in the terminal and nab these lines, you’ll want to open up Sublime Text 2 and navigate to the menu bar at the top. Next, click Sublime Text 2 » Preferences » Package Settings » SublimeClang » Settings – User.
After clicking, you’ll be presented a blank file. This is part of what’s known as a JSON file, and it’s what Sublime uses to keep track of settings. Here’s what you need to put in it in order for SublimeClang to compile your project properly.
{
    "options": [
        // Any flag you would normally add in your compile command can be added here as shown. Create an unused variable and uncomment “-Wall”!
        // "-Wall",
        // "-Wno-unused-variable",

        // Change these!
        "-I/usr/local/Cellar/gcc49/4.9.2_1/lib/gcc/4.9/gcc/x86_64-apple-darwin14.0.0/4.9.2/../../../../../../include/c++/4.9.2",
        "-I/usr/local/Cellar/gcc49/4.9.2_1/lib/gcc/4.9/gcc/x86_64-apple-darwin14.0.0/4.9.2/../../../../../../include/c++/4.9.2/x86_64-apple-darwin14.0.0",
        "-I/usr/local/Cellar/gcc49/4.9.2_1/lib/gcc/4.9/gcc/x86_64-apple-darwin14.0.0/4.9.2/../../../../../../include/c++/4.9.2/backward",
        "-I/usr/local/Cellar/gcc49/4.9.2_1/lib/gcc/4.9/gcc/x86_64-apple-darwin14.0.0/4.9.2/include",
        "-I/usr/local/include",
        "-I/usr/local/Cellar/gcc49/4.9.2_1/include",
        "-I/usr/local/Cellar/gcc49/4.9.2_1/lib/gcc/4.9/gcc/x86_64-apple-darwin14.0.0/4.9.2/include-fixed",
        "-I/usr/include",
        "-I/System/Library/Frameworks",
        "-I/Library/Frameworks"
    ],

    "additional_language_options": {
        "c++": [
            "-std=c++11"
        ],
        "c": [],
        "objc": [],
        "objc++": []
    }
}
You can see the dependencies revealed from earlier are now shown in quotes with
an -I and a comma separating each one. Obviously, these are just my file
paths. Yours could be different. The section at the bottom
additional_language_options can be copied directly from this article.
Save the settings file and close it.
We’re done with all the installation! You should be able to open your
helloWorld.cpp from earlier and add something incorrect. Save the file
(Cmd+s) and watch the errors pop up in the console below! Taking the
semicolon off the end or using a vector without including <vector> should be
enough to throw an error.
This means that you can open projects with Sublime Text 2 and have them link and compile correctly — allowing you access to autocompletion for the entire standard library, as well as anything you have in other included files!
